|
Updated: Febuary 2004
|
|
In
this tutorial, you will learn how to modify 3d models for
Battlefield: 1942 and Battlefield: Vietnam
3-D
models (also know as meshes) for Battlefield: 1942 and Battlefield:
Vietnam are stored in the StandardMesh.rfa archive file.
Requirements:
- Have completed the tutorial on creating a new mod
- Full installed game of Battlefield: 1942 or Battlefield:
Vietnam
- Discreet® 3ds max® 5 or higher, or Discreet®
Gmax® 1.2 or higher
|
| |
1.
|
Install
the 3ds max® toolset from the mod developer's kit by
running the 3ds max® toolset installer program. You
can also press the install 3ds max® tools button from
the Battlefield Mod Developement Toolkit front-end. The
next time you load up 3ds max® and you will find a new
menu named "Battlefield Tools".
For
Discreet® Gmax® 1.2 or higher run the install Gmax®
toolset button after Gmax® has been installed.
|
| 2. |
Choose
"RFA Tools" from the "Battlefield Tools"
menu to launch the .rfa archive utility. This is so we can
import an existing 3D model from the game.

|
| 3. |
Choose
"Open .rfa" from the File menu

|
| 4. |
Browse
to the /mods/bf1942/ folder of your installed game's location.
The "bf1942" mod folder has Battlefield: 1942's data files
for a normal game. For Battlefield: Vietnam you will choose
the "bfVietnam" mod folder instead of "bf1942".

|
| 5. |
Choose
the filen named "standardMesh.rfa" and press the "Open"
button.

|
| 6. |
Battlefield:
1942 - Select files Colt_base_m1.rs and Colt_base_m1.sm
Battlefield:
Vietnam - Select files W_AK47_Base_m1.sm and W_AK47_Base_m1.rs
These
files are part of a hand held weapon thus it will easy to
see any changes made to them in-game.
.rs files contain ASCII plain-text shader information (can
be edited with notepad).
.sm files contain geometry data that defines the 3-D model.
From the "Extract" menu choose "Selected".

|
| 7. |
Select
the My_Mod folder in the "Browse for Folder" dialog
and press "OK". This will extract the selected
files to your mod's folder so you can easily modify and
include these files in your mod.

|
| 8. |
In
3ds max® choose "Model Import/Export" from
the "Battlefield Tools" menu.

|
| 9. |
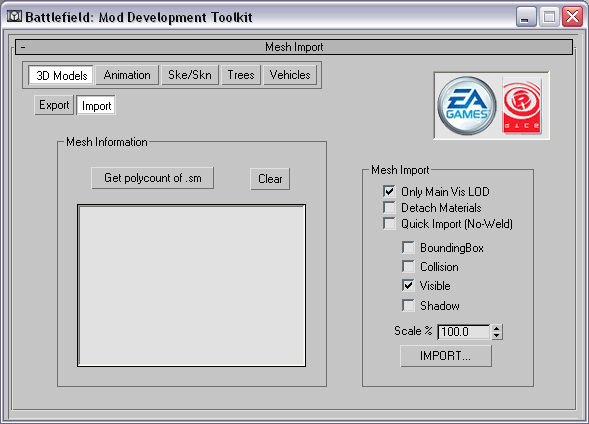
Press
the "Import" button (top left and under 3D Models)
to bring up the Mesh Import dialog screen. Set your options
to have "Only Main LOD/Mesh" and "Visible"
checked then press the "IMPORT..." button.
|
| 10. |
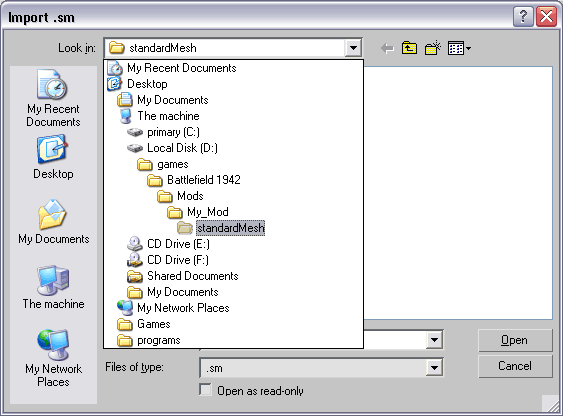
Browse
to /Mods /My_Mod/standardMesh/ directory of your installed
game.
|
| 11. |
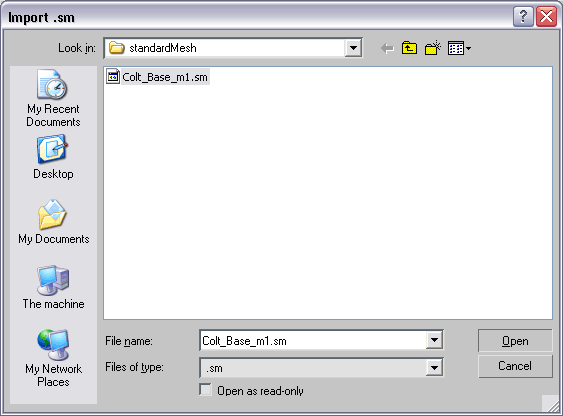
Select
the .sm geometry file you extracted earlier and press the
open button.
|
| 12. |
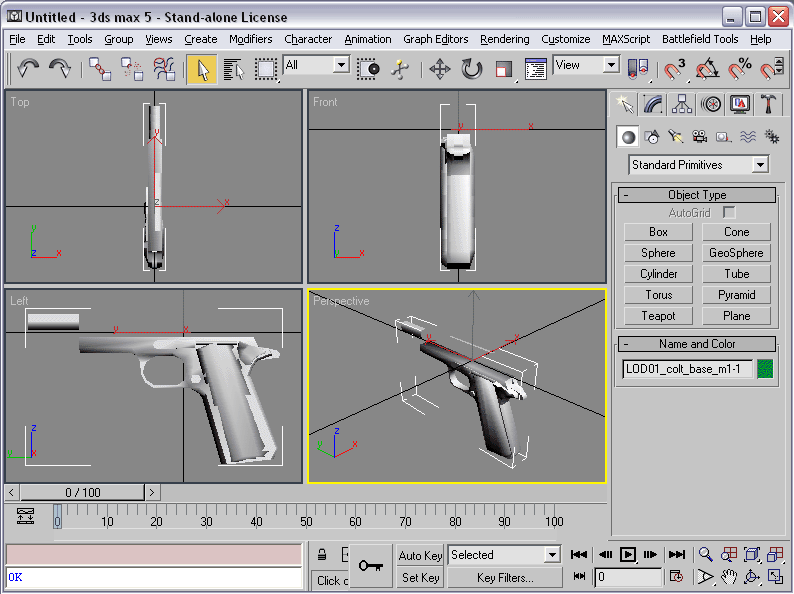
Here
is how the model looks imported into 3ds max®.
Press
the "Z" key on the keyboard by default to zoom-extents
of the model, you can also use the viewport zoom tool.
|
| 13. |
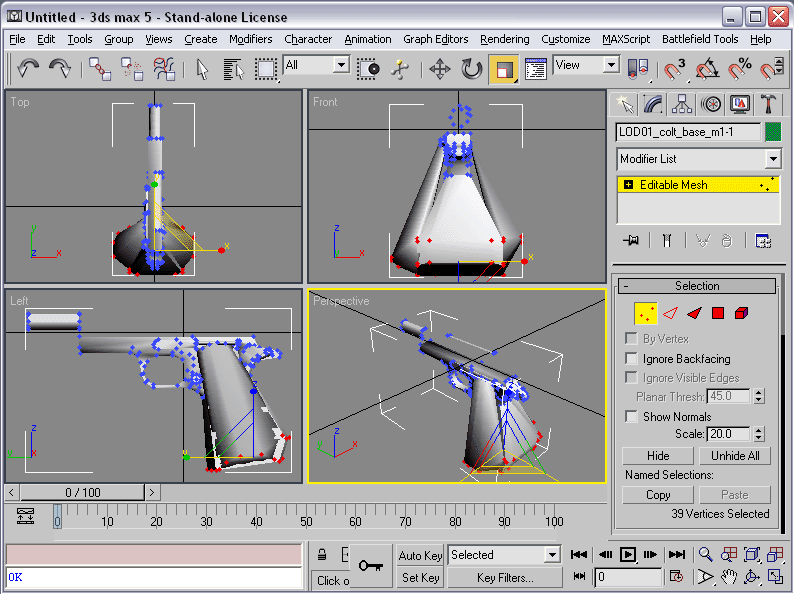
Set
modify mode and sub object vertex on the LOD01 named node.
Then use the selection and scale tools to deform the mesh
into an odd shape. This is so we can easily see in game that we
have changed the model.
|
| 14. |
Goto
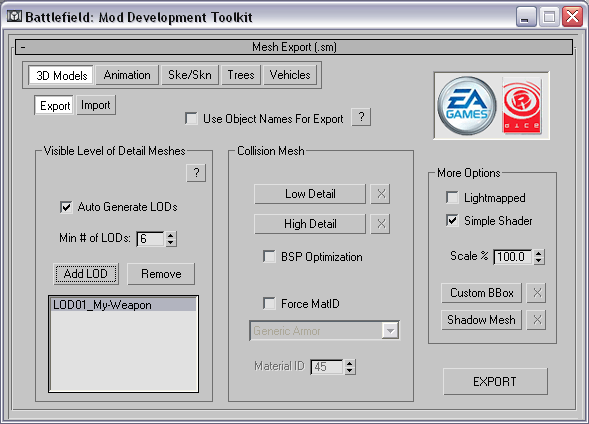
the export 3d model screen and press Add LOD, then pick
the scene node (object) with the name starting with LOD01.
This is the primary visible model.
Check Auto Generate LODs and set the Min # of LODs spinner
to 6, this will tell the exporter to generate 5 additional
meshes of progressively lower detail to use. LOD meshes
are used to increase game performance by switching to lower
detail versions of the primary visible model when the camera
is further away from the object.
Note:
Autogenerate
LOD's is for 3ds max® only, Gmax® does not include
features to automaticly generate LOD's. If you need additonal
LOD's you will have to create reduced versions of the model
manually.
Press
the export button then choose the same filename as the .sm
file you extracted to /Mods/My_Mod/Standardmesh
|
| 15. |
Press
yes to the dialog box that pops up to overwrite the existing
file.

|
| 16. |
In
/Mods/my_mod/archives/ run PackRfa.exe, select standardMesh
from the folder drop down list (right side) and press the
"Pack Folder" button.

|
| 17. |
Here
is a screen shot of the /Mods/My_Mod/Archives directory
with the file archive "standardMesh.rfa" packed.

|
| 18. |
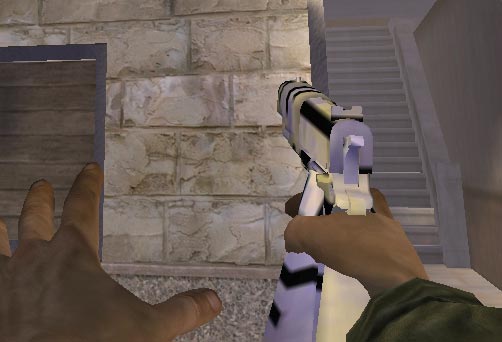
Here
is how the new weapon model looks in Battlefield: 1942:
(Note: Below image shows weapon with a modified .dds texture
as well)
|
| |
|
| |
-- End of Tutorial --
|


